
This page guides you to integrate and verify Contlo SDK in your React Native application.
Prerequisites
To start the SDK integration, you must first create an API key and install the Mobile Push app from the Contlo App market. Go to your Contlo Dashboard and follow the steps below:
Create an API key
- Go to your profile section at the top right corner and click Settings.
- Go to Accounts > Store Settings from the sidebar on the Settings homepage.
- Go to the API keys tab on the Store Settings page and click Create key on the Private API keys section.
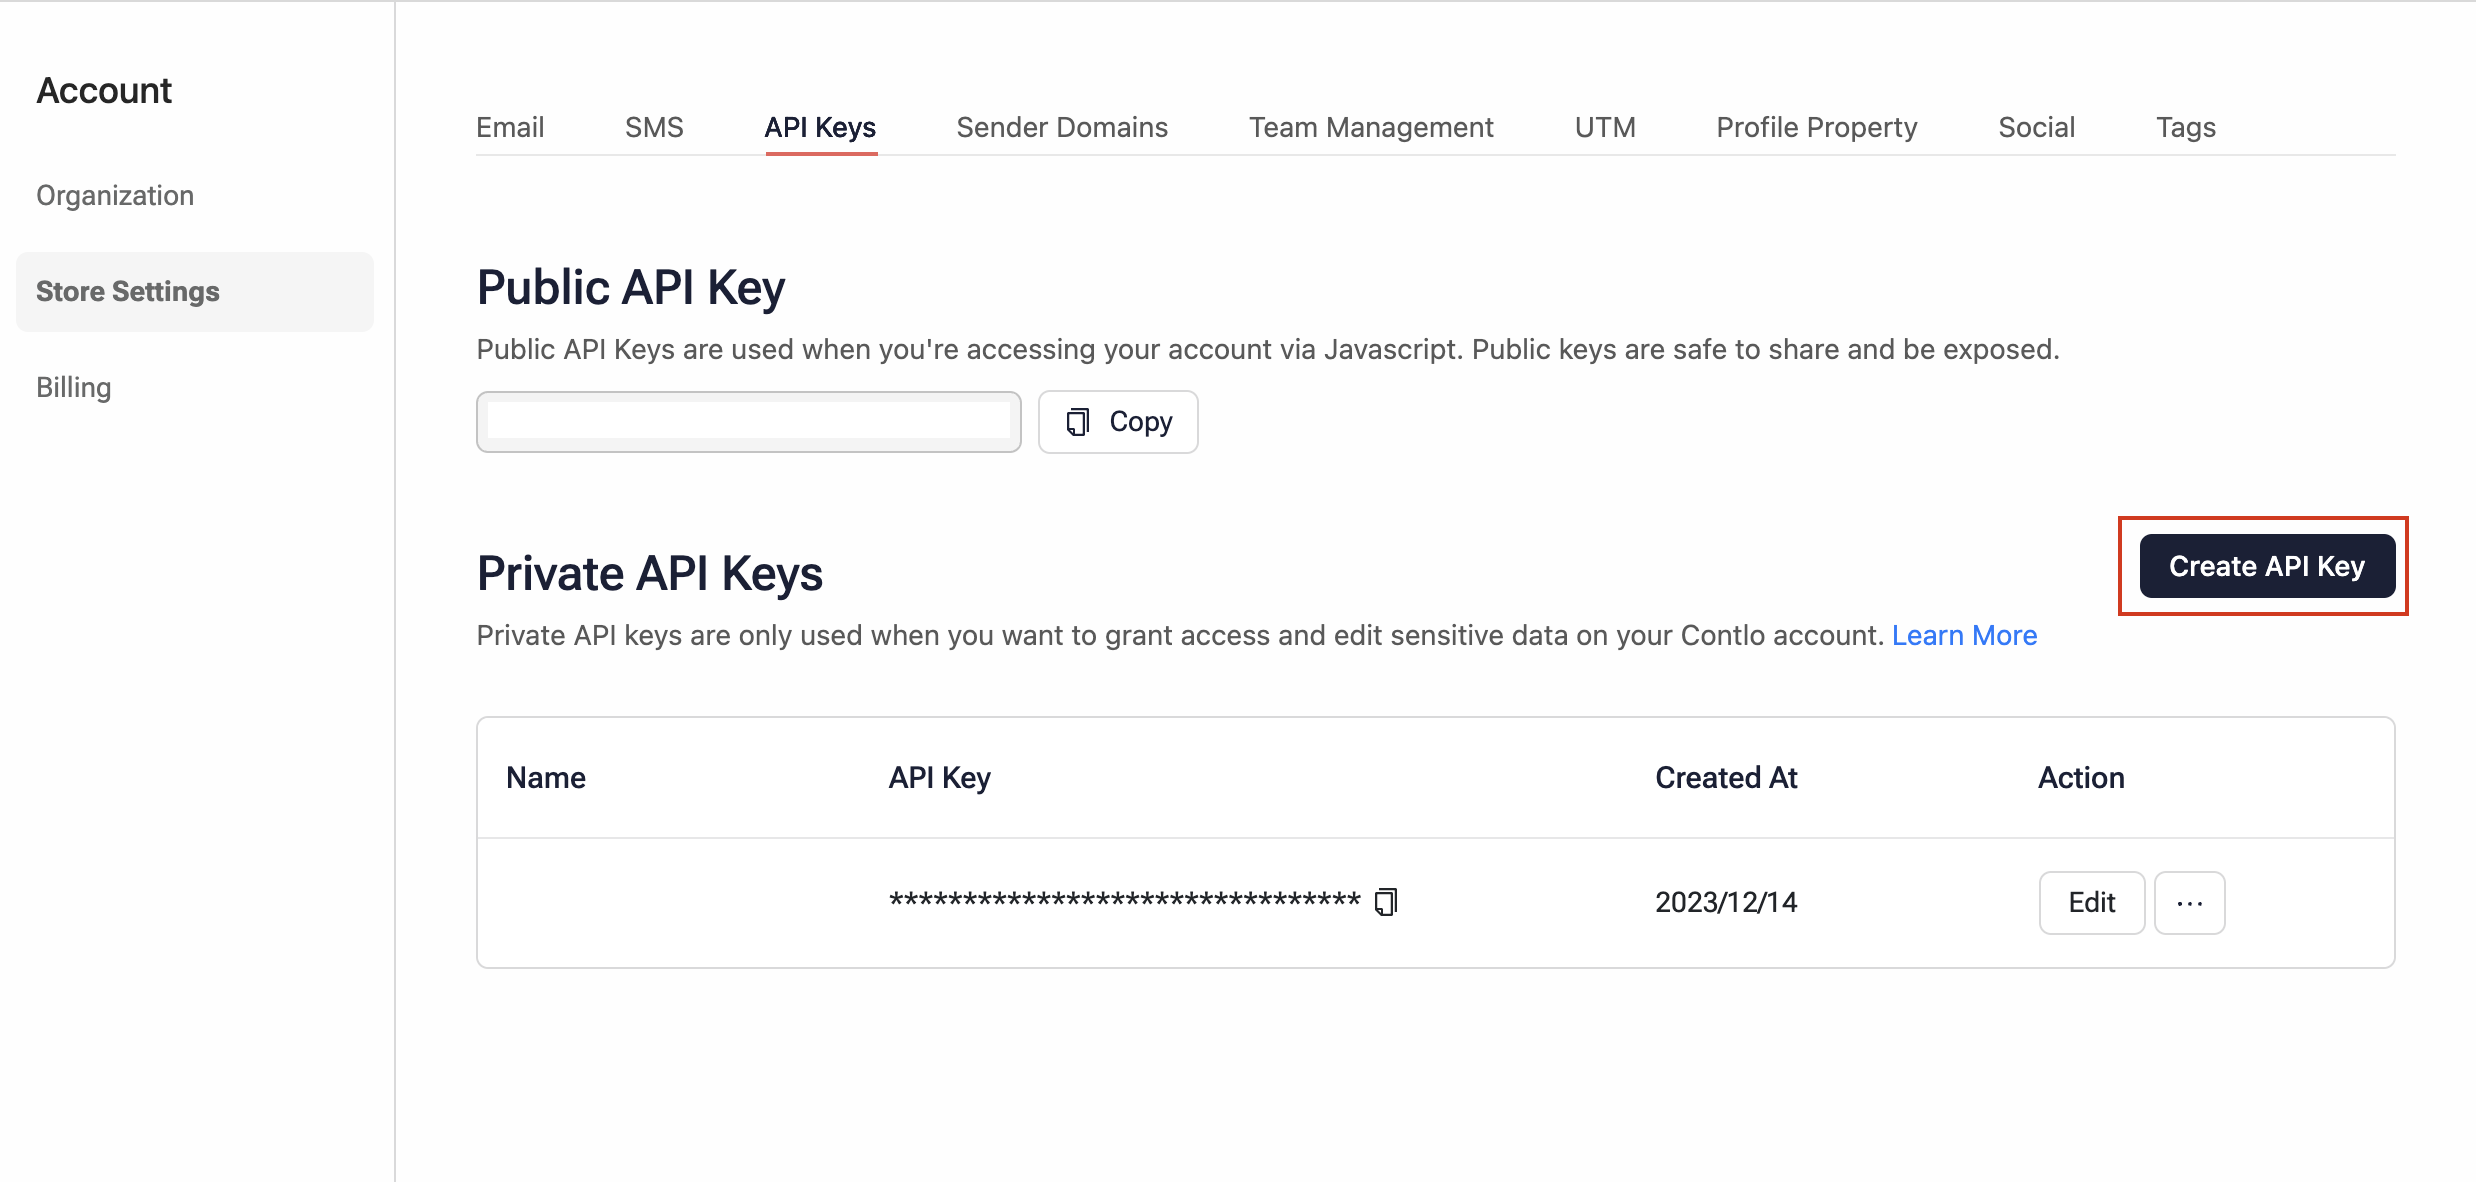
- Copy the newly created API key to add it later during the SDK integration.
Install Mobile push
- Go to App Market from the sidebar and search Mobile Push.
- Click Install.

Installation
To install the Contlo SDK in your React Native project, follow the steps below,
- Open your project directory in a terminal, and use the following command to install the Contlo React Native SDK via npm:
npm install contlo-react-native-sdk
- To use the Contlo SDK in your React Native project, import the SDK in the respective file as shown below:
import * as Contlo from 'contlo-react-native-sdk'
Initialization
Once the installation is complete, follow the steps below to initialize the Contlo SDK:
- Open the file that represents the start of your application and import the React SDK as shown below:
import * as Contlo from 'contlo-react-native-sdk'
- Add the Contlo's
init()method and pass the API key (created from the Contlo dashboard) as the parameter.
Contlo.init("<API_KEY>")
Verify Integration:
After initializing the SDK, open your application on a device or emulator.
Go to the Audiences section on your Contlo dashboard. You would see a new anonymous user is created.
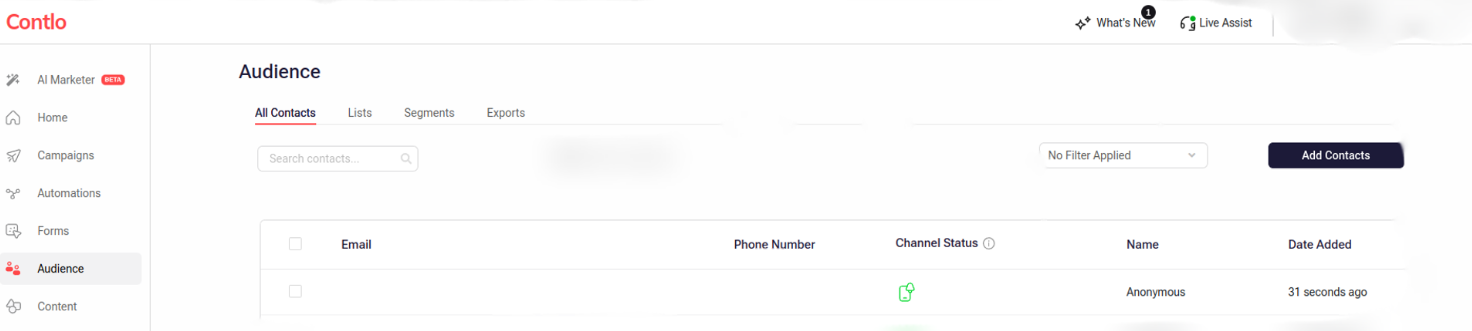
You have successfully integrated the Contlo React Native SDK.
Welcome aboard!