
Contlo's Web SDK enables you to send push notifications to your Web application from the Contlo dashboard.
Install Web push
Before creating a web push campaign, you must install and configure Web Push from the App market. Follow the steps below:
- Go to App Market from the sidebar and search Web Push
- Click Install. It opens the Push Opt-In Settings page.
- Configure these settings as per requirement.
Create a web push campaign
To send a Mobile Push Campaign using Contlo, follow the steps below:
- On your Contlo Dashboard, go to Campaigns → Create Campaign → Create Web Push.
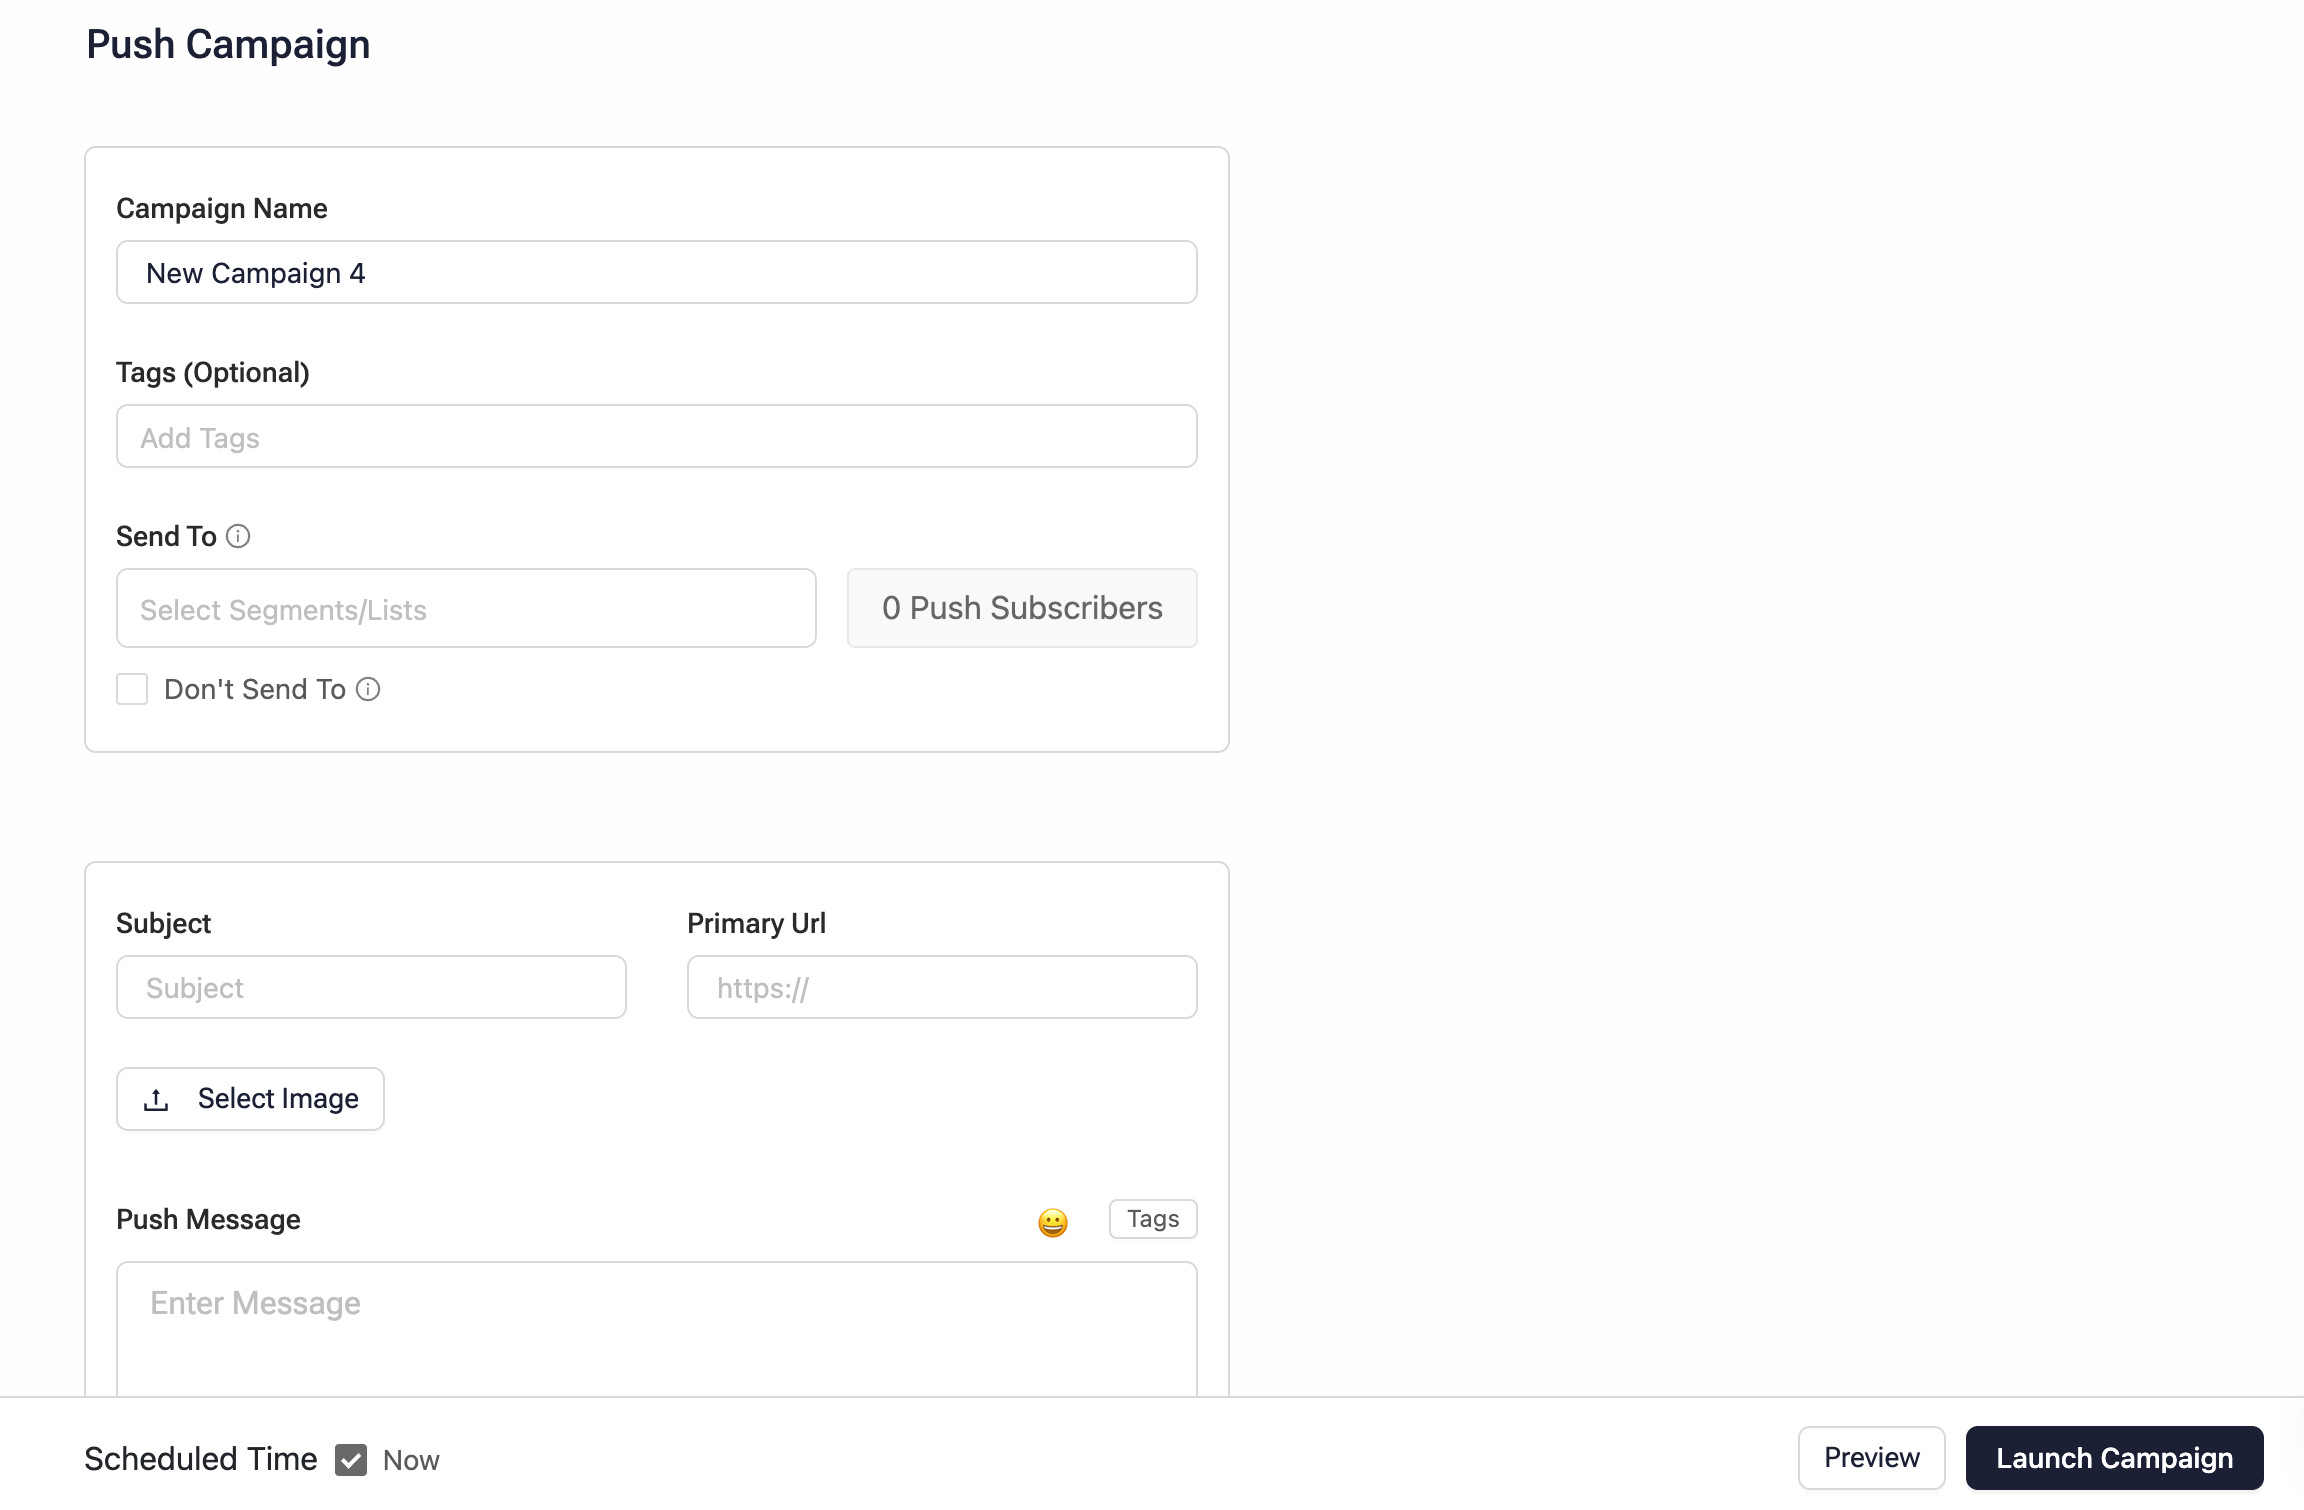
- On the Web Push campaign screen, fill in the required details. (* implies the mandatory fields.)
- Campaign Name*: Add the name of your campaign.
- Send To*: Select the Segments or lists of users to whom you want to send the Push notification.
- Subject*: Add the notification header here.
- Primary URL*: Add the URL for deep-linking a website's page in the notification that opens on a user's click.
- Select Image: Upload an image that would be displayed in the notification.
- Push Message*: Enter the message that appears on the notification.
- Add Expiry Date: Specify the deadline until which attempts are made to send the push notifications in case they are undelivered.
- Add Button: Add the buttons you want in the notification here. You can define the button text and the destination when it is clicked. You can add a maximum of two buttons.
- Click Save Changes.
- Click the Preview button to see how your notification would look.
- Click the Launch Campaign button to run the campaign and send push notifications to the target users.