This page guides you to enable sending push notifications to your users.
Enable Push Notification
To enable push notifications for your application, please follow these steps:
-
For Android 13 and above:
- You must explicitly seek the user's consent to receive push notifications.
- Open the AndroidManifest.xml file and add the following permission:
<uses-permission android:name="android.permission.POST_NOTIFICATIONS" />
-
For Android 12 and below:
- If your device has Android 12 or an older version, it automatically allows notifications to be sent.
-
To get user consent, use the
sendPushConsent()method as shown below:
Contlo.sendPushConsent(<consent>) // returns true if consent was granted
- Depending on whether consent is granted (true) or not (false), this method either subscribes or unsubscribes your audience from Mobile Push via your Contlo Dashboard.
Set up Mobile push credentials
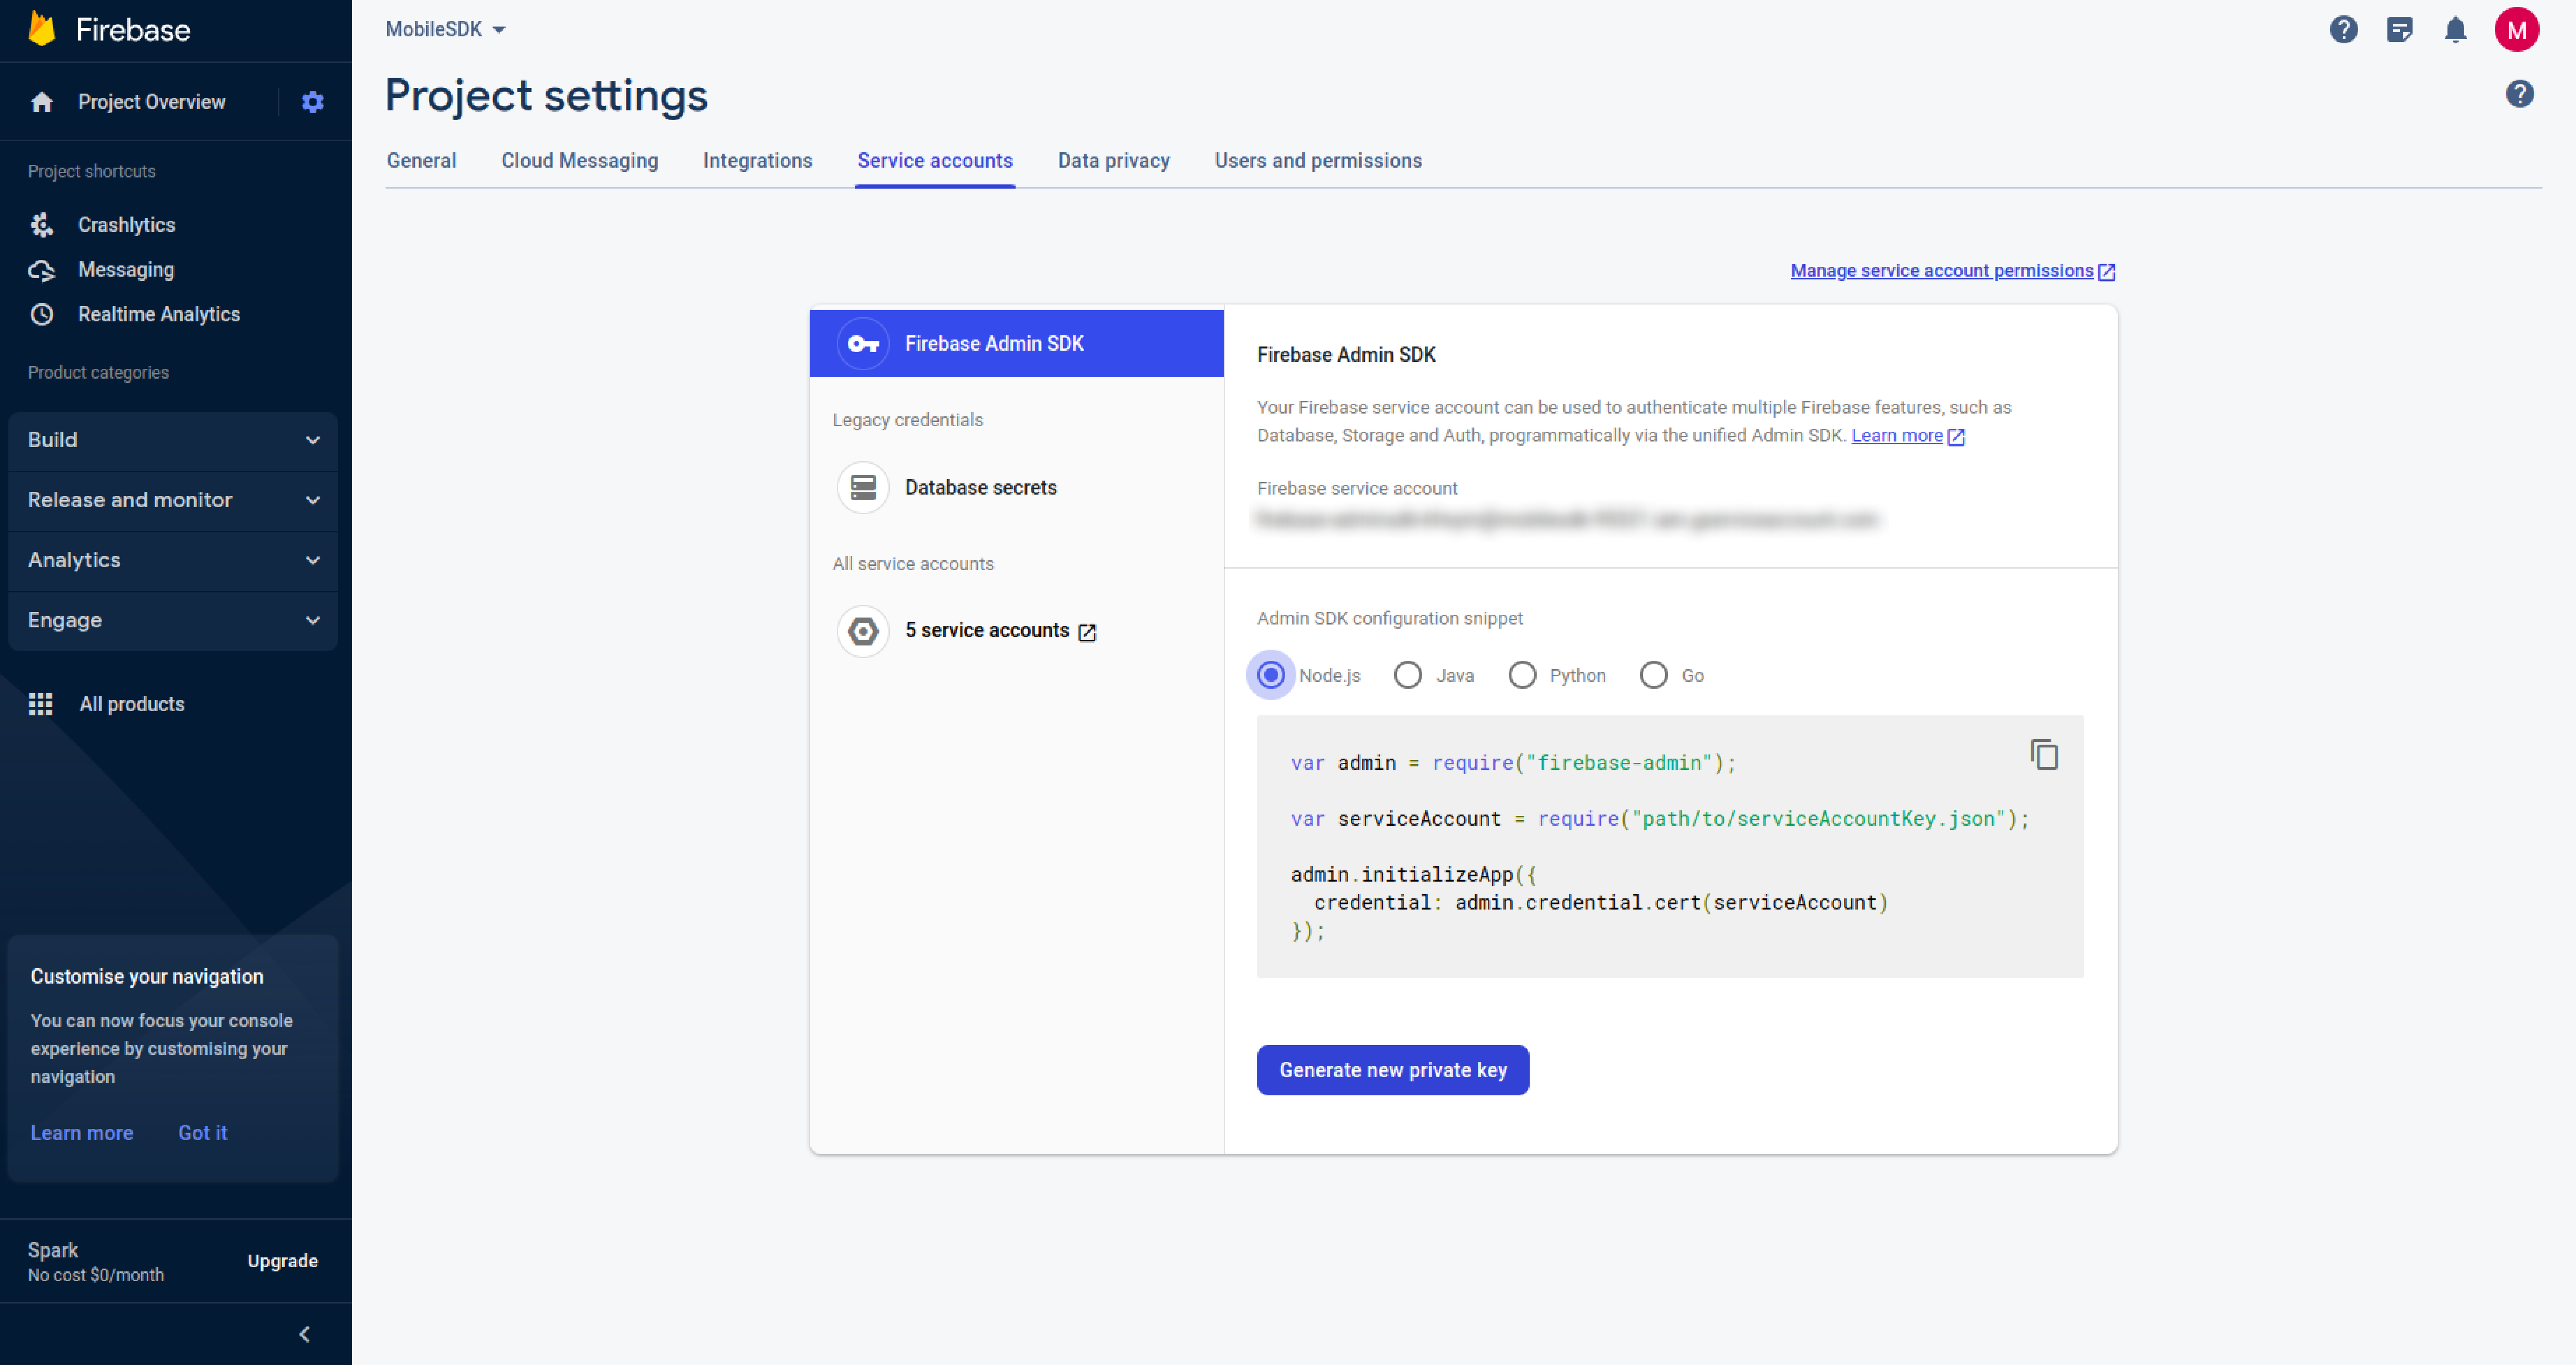
Open your Firebase project and follow the steps below:
- Go to the Project Settings and click the Service Account tab.

- Click the Generate new private key button to generate a JSON file with Firebase admin SDK credentials. If you have already generated one, use it for the next steps.
- Open the JSON file to get the credentials required for Contlo.
Push settings on Contlo Dashboard
To configure sending Push notifications from the Contlo platform, follow the steps below:
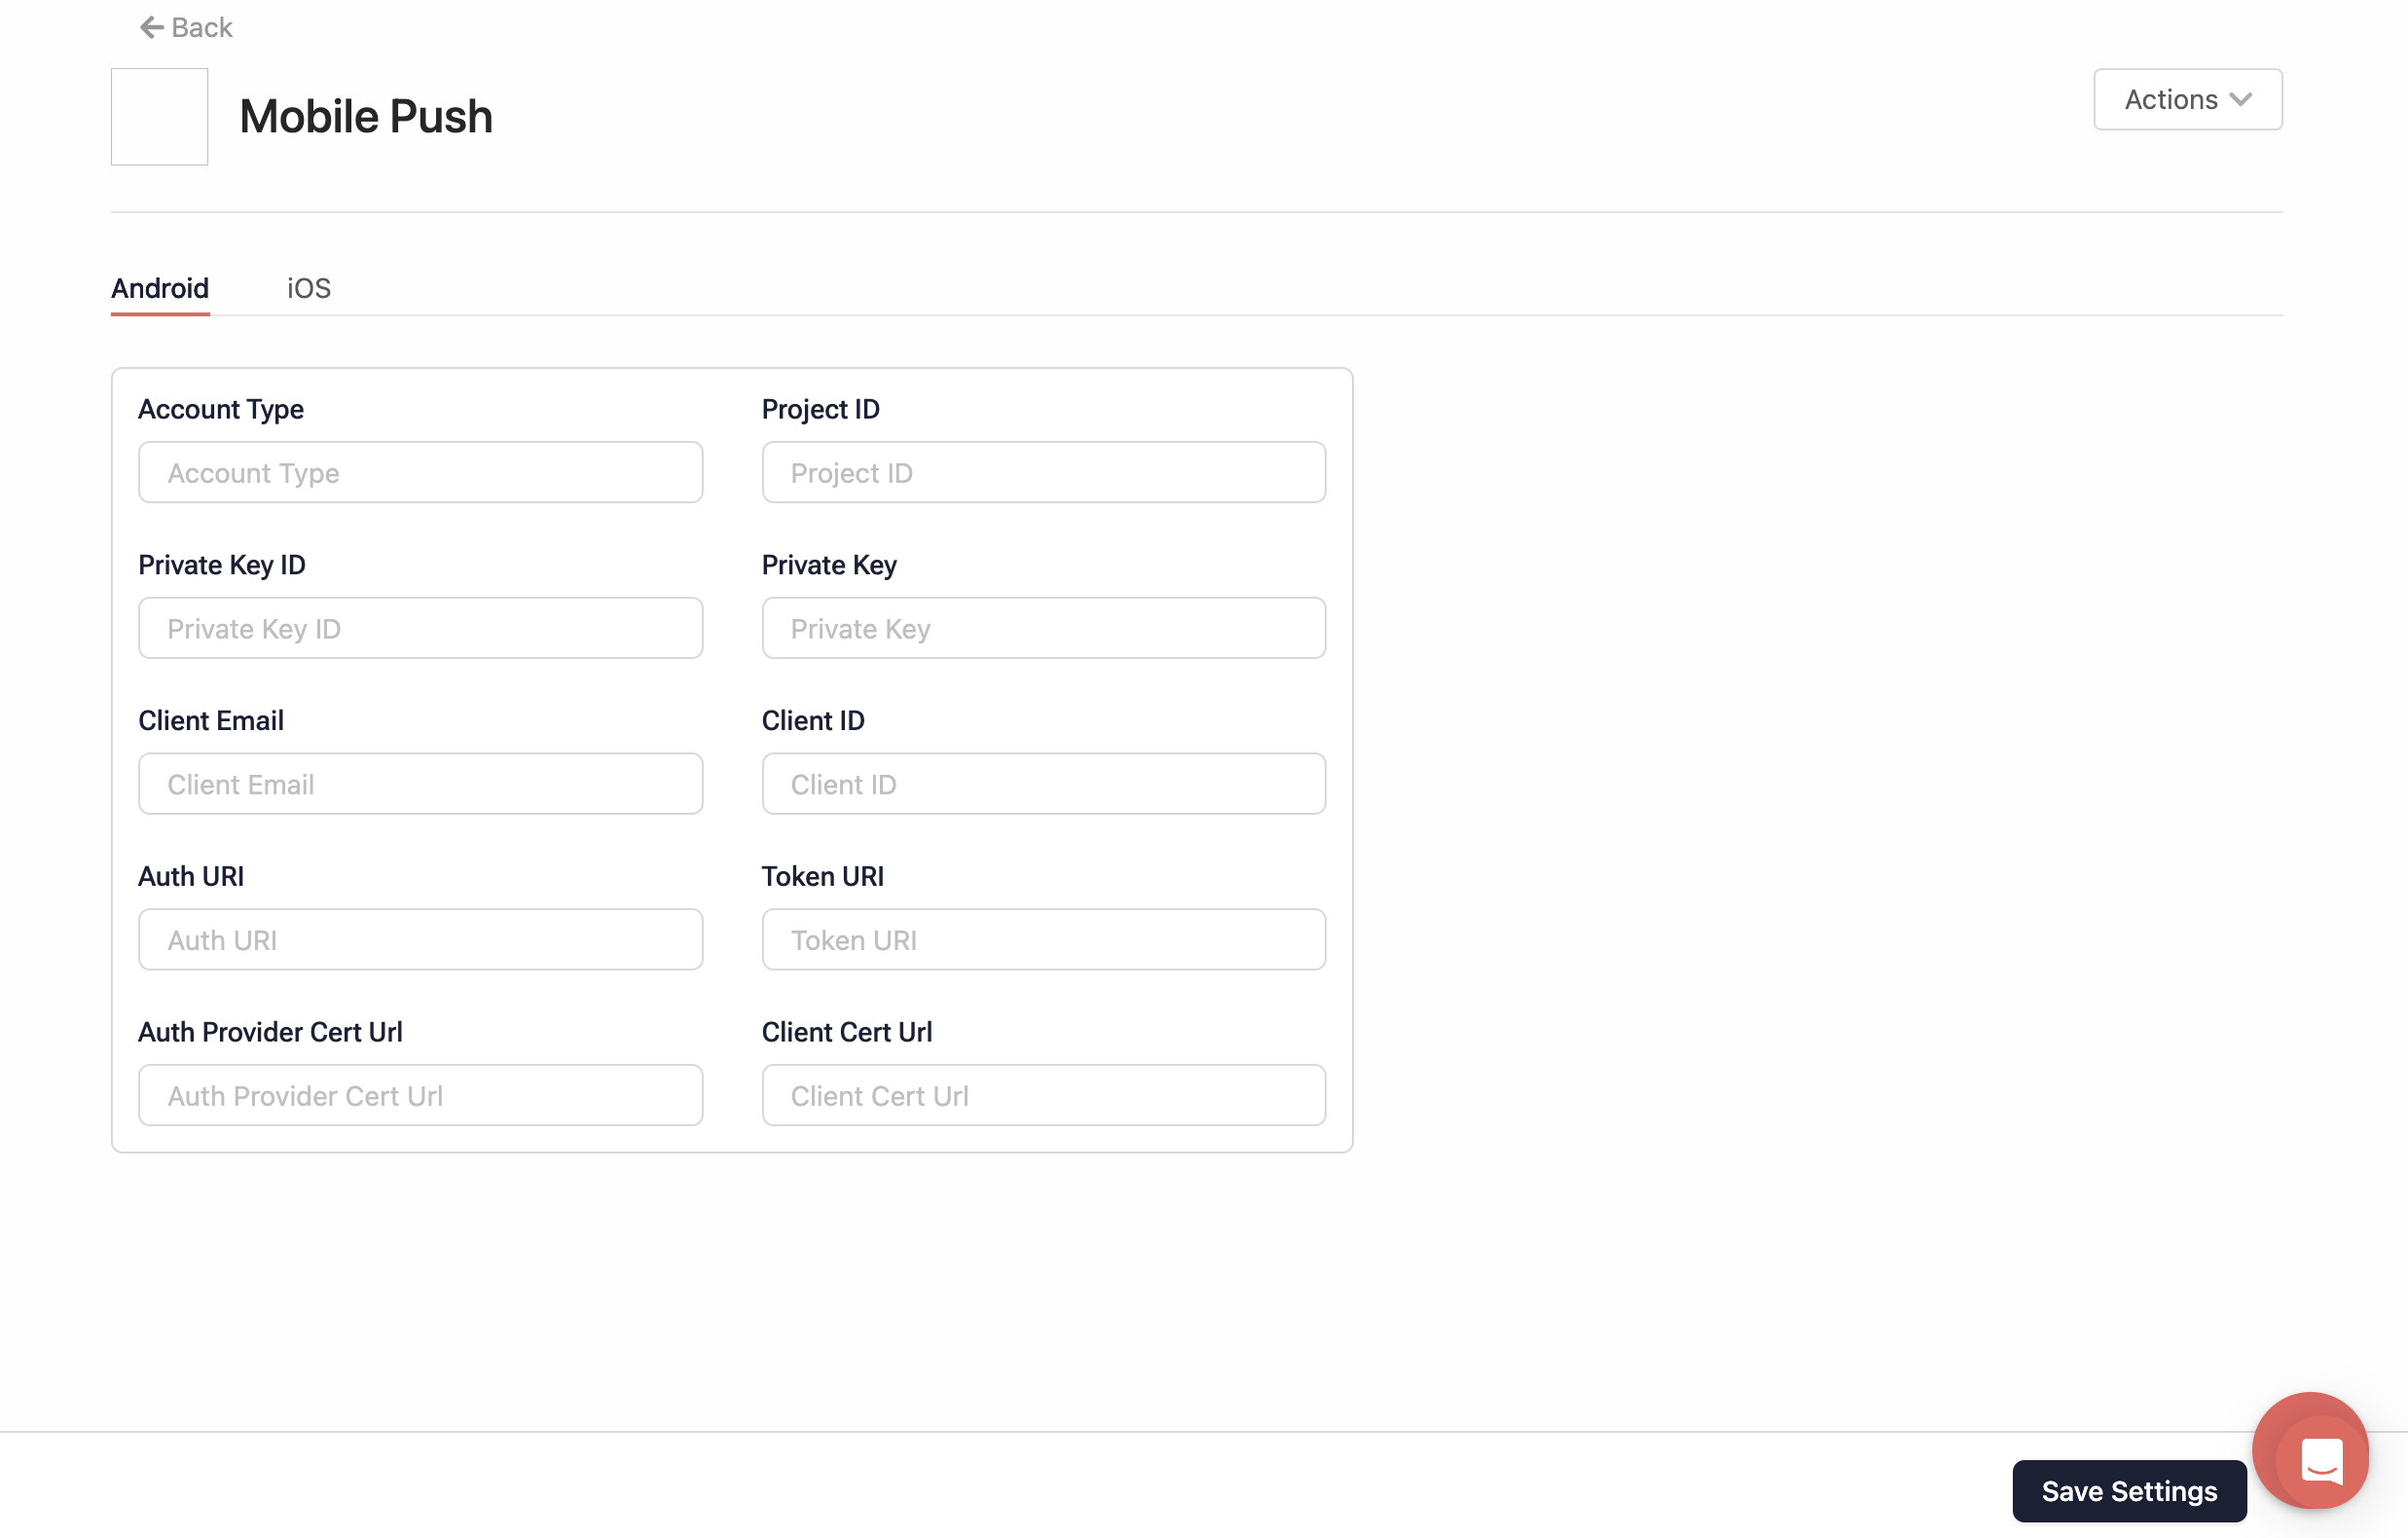
- Go to the Contlo Dashboard and navigate to the App Market on the left navigation bar.
- On the App Market screen, choose All category & search for the Mobile Push app.
- Open the App, go to the Android tab & set the credentials as per your Firebase JSON file, and then click Save Settings.

Use only Contlo notifications
If you have not set up Push Notification for your application, and only want to use Contlo’s push notification,
add the following service to the AndroidManfest.xml file:
<service
        android:name="com.contlo.androidsdk.push.NotificationHandler"
        android:exported="true"
        tools:ignore="Instantiatable">
          <intent-filter>
             <action android:name="com.google.firebase.MESSAGING_EVENT" />
          </intent-filter>
</service>
Use Contlo notifications with your Push notifications
- Once you have setup Firebase and Mobile SDK in Contlo, navigate to the class that uses FirebaseMessagingService.
- For sending the Firebase token to Contlo, navigate to the onNewToken method and call the
updateFcmToken()method as shown below:
ContloNotification.updateFcmToken(this, token)
- In the onMessageReceived method, call the
processContloNotification()method as shown below:
ContloNotification.processContloNotification(this, message)
Sample code:
package com.contlo.mobilesdk

import com.contlo.androidsdk.push.ContloNotification
import com.google.firebase.messaging.FirebaseMessagingService
import com.google.firebase.messaging.RemoteMessage

class NotificationService(): FirebaseMessagingService() {

    override fun onMessageReceived(message: RemoteMessage) {
        super.onMessageReceived(message)
        ContloNotification.processContloNotification(this, remoteMessage = message)
    }

    override fun onNewToken(token: String) {
        super.onNewToken(token)
        ContloNotification.updateFcmToken(this, token)
    }
}
- After completing these steps, ensure that you have included your class within the AndroidManifest.xml file.
Deep-linking
To enable deep-linking in the push notifications, open the AndroidManifest.xml file, add the following code inside the activity tab that you want to deep-link, and change the credentials as per your application:
<intent-filter>
                <action android:name="android.intent.action.VIEW" />
                <category android:name="android.intent.category.DEFAULT" />
                <category android:name="android.intent.category.BROWSABLE" />

                <data
                    android:host="sdk"
                    android:pathPrefix="/notif"
                    android:scheme="flutterapp" />
                <data
                    android:host="sdk"
                    android:pathPrefix="/btn1"
                    android:scheme="flutterapp" />
            </intent-filter>
